 |
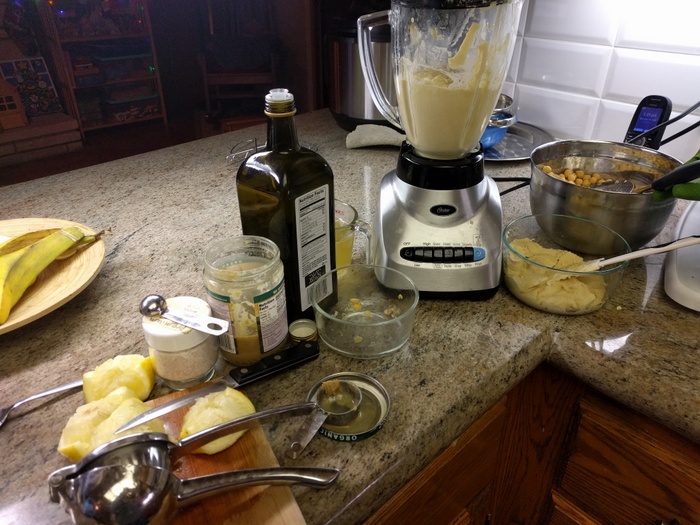
| Garbanzo beans, tahini, EVOO, salt, lemon juice. Everything you need to make sensational hummus. |
Fresh hummus is a constant in my refrigerator. My husband (on a special low salt diet) enjoys it as a daily snack with veggies or his favorite salt-free tortilla chips. My 5yo eats it plain with a spoon (and it works fabulously to keep her naturally sluggish digestive system humming along). My 7yo eats it with pita chips for a delicious and filling after-school snack. I love it with apple slices and carrot sticks. Made from scratch, hummus is fabulously cheap, nutritious, and delicious!
But having fresh homemade hummus on hand all the time used to require me using my blender at least
 once a week. And I do not enjoy cleaning the blender. For years I cooked large batches of garbanzo beans (a.k.a. chickpeas) from scratch and froze the cooked beans in 2-cup servings to avoid using canned beans. But this required me to remember to defrost the beans and bust out the blender almost weekly in order to have fresh hummus. Now I use my blender about once a month and have fresh, delicious hummus made from dried garbanzo beans available at all times for my family to enjoy.
Here's how I do it.
I make all the garbanzo beans into hummus as soon as the beans are cooked, and freeze the hummus in 2-cup containers
 .
.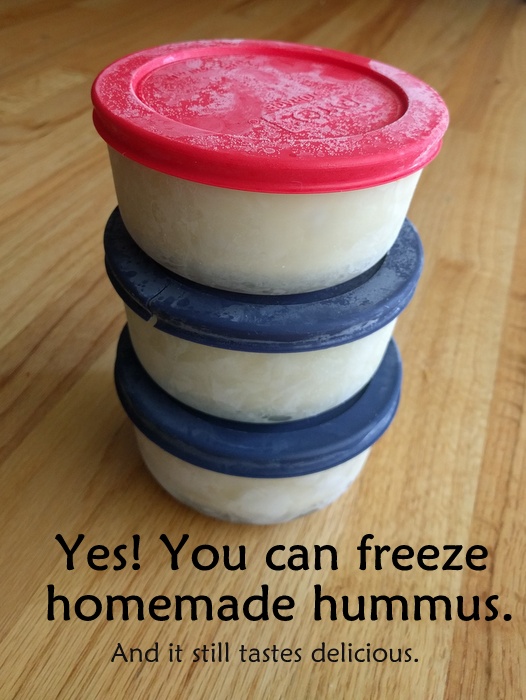
Instead of freezing the cooked beans, I freeze the hummus. My friend Heidi recommended this to me and assured me that it did not ruin the texture of the hummus. Upon reflecting that I had seen hummus sold in frozen portions in Costco and other stores, I decided to give it a try. Now let's be honest. The hummus you eat the day you make it is the very best. But the hummus defrosted from the freezer is also completely delicious, and the texture suffers minimally. It is 100% worth not having to clean hummus out of the blender every week. Some folks think you get a better texture if you use warm beans to make your hummus. I have not tested this theory with a warm beans versus cold beans comparison, but the texture from my hummus made from warm beans right out of the pressure cooker is lovely.
With about 30 minutes total of hands-on time, you can have 10 cups of homemade hummus deliciousness (made from scratch!).
Soak 3 cups garbanzo beans in water with 2 teaspoons salt for 24 hours or overnight (I prefer 24 hours because the beans seem to give me less gas). I used to think it was a complete no-no to soak or cook beans with salt. Not so! Now I soak my beans in a little salt (and cook them with a little salt) based on Cook's Illustrated's
 technique.
Drain and rinse beans. Cook beans using your preferred method. I cook mine in the Instant Pot
 electric pressure cooker. If you like to make beans from scratch, you should own an Instant Pot. I love my Instant Pot. That is a subject for another post.
Combine soaked beans, 1/2 teaspoon salt, 1 to 2 tablespoons oil, and fill the water up to line 9 if using Instant Pot (about 7 cups water). Then cook on high pressure for 11 minutes and allow pressure to come down naturally. I often let it sit on low for multiple hours after high pressure has finished until it's convenient for me to make the hummus.
Now for the hummus. Three cups of dried beans makes 9 to 10 cups cooked beans. I can usually get 5 batches of hummus from these beans, but sometimes make 4 large batches (with a heaping 2 cups of cooked beans per batch) depending on how many plain cooked garbanzo beans my 5yo chooses to eat while I'm making the hummus. You can also toss a few whole beans (if you've got a handful of extra) on top of each batch and serve hummus just like my favorite Mediterranean restaurant! I often fill one 4-cup Pyrex for the fridge on Hummus Factory Day because that first batch always goes pretty darn fast.
 |
| I forgot to take a photo until this 4-cup container was almost gone. |
Hummus
Ingredients listed in the order I put them in blender.2 tablespoons extra virgin olive oil (EVOO is best consumed raw, so it's perfect for hummus)
2 tablespoons tahini

2 tablespoons water (I use broth from cooked beans)
2 cups garbanzo beans or 1 can beans
 (I use the 2-cup Pyrex container I'm going to freeze hummus in to measure the cooked beans.)
1/2 teaspoon salt (I like Real salt
 )
)Juice from 1 lemon (We have a lemon tree, so this is easy for me. The fresh lemon juice makes for very tasty hummus but is not 100% essential. But, if you are making hummus en masse, why not just spring for a bag of lemons?)
Blend on high for at least 1 minute. I am picky about plastic and food, so I own an Oster Blender with a glass jar
 (rather than one of the fancy-schmancy blenders with hard clear plastic jars), which means I usually have to stop the blender 5 seconds in, stir everything up, and then continue blending. If your blender is really struggling, add more liquid or oil a tablespoon at a time. Add more salt to taste.
Enjoy immediately or freeze in a 2-cup container. Then repeat with the next batch. This recipe makes slightly more than 2 cups of hummus, so if filling a 2-cup container, either enjoy a little right now, or use the excess to start filling the next 2-cup container. I like Pyrex 2-cup containers
 for freezing. Hummus will defrost overnight in the fridge.
 |
| Creamy decliousness. |
Enjoy your hummus with sliced apples, carrot sticks, cucumbers, Stacey's organic pita chips
 , homemade whole wheat pita chips (made in the toaster oven with whole wheat pita bread), pretzals, tortilla chips, or plain with a spoon (my 5yo's preferred method).
Related Posts
- Whole Grain Chocolate Chip Snack Bars
- Healthy Homemade Snack: Whole Grain "Cookies"
- Homemade Chewy (Not Crumbly) Granola Bars
- 100% Whole Grain Muffins with ApplesauceEasy-peasy DIY Trail Mix
- Hate Stirring Natural Nut Butters? Read This.
- Eat Less Plastic: 33 Ways to Keep Plastic Chemicals Out of Your Family's Diet
Would you like more ideas and tips about Going Green Gradually? Sign up for my free email subscription to get each of my posts delivered to your inbox (I usually post one or two times a week). You can also follow me on Facebook, Google Plus, Pinterest, Twitter, or with your favorite RSS Reader. I hope to see you again soon!
Disclosure: This post may contain affiliate links. Your purchase via these links helps support my blog. Thank you for your support. Read my full disclosure policy here.


This is such a good idea to freeze it and always have some on hand! I am going to try it this week. Thanks Betsy!
ReplyDeleteThanks, Meagan. I hope you enjoy your hummus as much as we do!
DeleteYour post inspired me when I first saw it, but I finally had a chance to try it just last night and loved the results!! Great flavor and texture and your idea to use the 2C pyrex is brilliant. I was using quart jars to freeze before and it wasn't working for me. This time I also used my new Instant Pot that my mom gave me for Christmas and it makes it so much easier! (I didn't presoak the beans though...I've read numerous sources that say it's not necessary for several reasons). I did add some garlic cause I love garlic. Have you made your own tahini? It's pretty easy and I've actually just decided to skip a few steps and just use toasted sesame seeds. I put all the ingredients except the Garbonzo beans into the blender first with 2 T of sesame seeds which pretty much creates tahini! Then add the beans and it whips right up. Probably need more oil/water to make it the right consistency though. My family is very happy that we have hummus in the house again, and I told them it's all because of Betsy :)
ReplyDeleteYay! I love garlic too, but my digestive system doesn't, sadly. That sounds like a great idea to use sesame seeds. I will have to try that, although I wonder if my blender is powerful enough...
Delete